Finders, Keepers continued
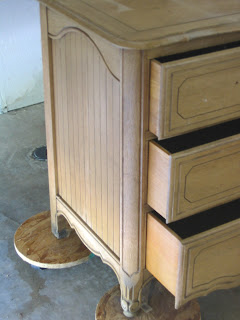
 As you can see from the photo, there was some weathering to the legs of this piece that resulted in a black stain. The process of stripping the piece seemed to naturally bleach the wood a bit and it wasn't necessary for me to do anything else to it. After the piece is completely stripped of old varnish and coating which had accumulated, you then begin sanding. Sanding takes about as long as the stripping. I used a palm sander in the direction of the wood grain (very important). I used a medium grade for the first layer of sanding. I used a sponge sanding tool for the rounded corners. To get in the crevices, I folded the sanding paper in half and rubbed in the grooves with the folded edge.
So, after you get really sick of sanding, you get to sand some more! But, progress to the finer sandpaper and you will be so pleased at how smooth your piece becomes. When the entire piece is sanded and smooth to your satisfaction, then you need to clean off all the dust; a tack cloth is very effective for doing this. I also used a dry paintbrush to clear out the crevice areas. The next step is to use a product intended to remove any chemical from the stripping product from the surface of the wood. I don't remember the name of the product, but it should be easy to find in the paint department. When you have "cleaned" the wood surface, then you apply your stain with a paintbrush and wipe off the excess with a paper towel ( or many towels!).
Applying the stain is probably the trickiest part of the process. You want to stain one entire surface in one session, but start with an area about 12" square. Apply the stain with a paintbrush and leave for 30 seconds before you start rubbing off lightly the leftover stain with a paper towel. When you do this, you will see the finished color of the wood and you can decide to leave the stain on longer for a darker finish. I chose a walnut stain for this project.
To see phase 3 of this project, click here.


Comments